How to Deburr Invar Without Adding Residual Stress
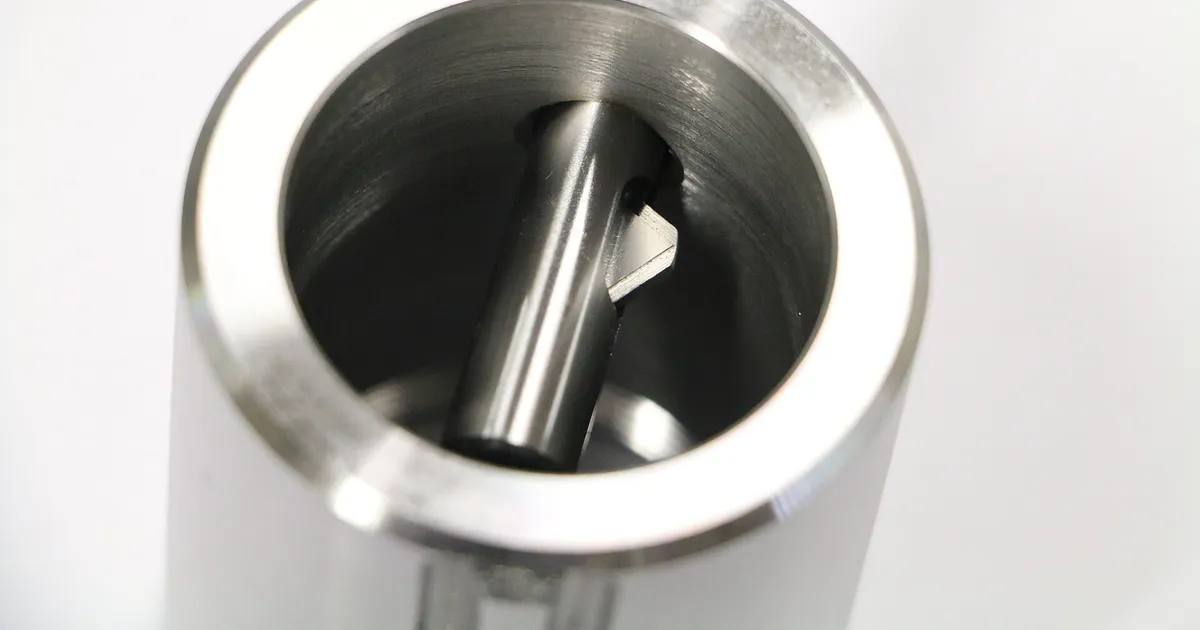
A burr is a thin ridge of metal left on the edge of a cut. It looks small and gets treated as a detail, but on a precision part it is a real defect. It can cut a hand, snag a seal, jam a thread, break loose in a vacuum chamber or press a mating part out of position by a few micrometers. Invar makes burrs more often and makes them harder to remove than most metals. At the same time, every way of removing a burr adds some mechanical or thermal effect to a part that was bought for its stability. This guide explains the methods and when each one fits.
Why Invar burrs are different
Invar 36 is soft in the annealed condition and tough. It deforms before it cuts. When a tool leaves the edge of a part, the last bit of material has no support and bends over instead of shearing. This leaves a burr that is long, curled and attached along the entire edge, sometimes called a Poisson or rollover burr. Low thermal conductivity makes the cutting zone hot and the metal smearing worse.
Four habits reduce burr size at the machine:
- Sharp tools with positive geometry and honed edges, replaced before they dull
- Light final passes with a small stepover, so little material remains on the edge
- A planned exit: climb milling, a backing chamfer or a direction change that avoids leaving unsupported material
- Chamfering with the same program, so the edge break is cut, not formed by a later hand step
The cutting side of this is covered in Invar milling strategy. Even with good practice, a final deburring step is normal.
Edge break, size and the standard
“Deburr” on a drawing is vague. A clear callout names the size of the edge break and the edge condition. Typical practice:
| Callout | Typical size | Used for |
|---|---|---|
| Break all edges | 0.1 to 0.3 mm | General machined parts |
| Sharp edge, no burr | Below 0.05 mm, burr free | Sealing faces, optical contact surfaces |
| Chamfer | 0.5 mm by 45° or as drawn | Holes, assembly lead-ins, safe handling |
| Radius | 0.2 to 1 mm | Fatigue-sensitive or handled parts |
Typical values only. ISO 13715 gives a notation for edges of undefined shape that many drawings use.
Say which edges need the tightest control. Sealing faces and bearing faces need sharp but burr-free edges. Outer edges only need safe handling.
The main methods and their stress effect
Each method removes the burr by a different mechanism and leaves a different mark.
| Method | How it works | Stress and heat effect | Typical fit on Invar |
|---|---|---|---|
| Cutting a chamfer in the program | Tool removes the edge material | Low, same as machining | First choice wherever the tool can reach |
| Manual scraping or stoning | Hand tool lifts the burr | Local cold work, depends on pressure | Small parts, small lots, hard-to-reach edges |
| Abrasive brush or nylon wheel | Abrasive filaments wipe the edge | Low to moderate, pressure sensitive | Flat edges, plate parts, finishing touch-up |
| Vibratory or tumbling | Media rubs the part in a bowl | Can peen thin edges or embed media | Small, stiff parts only |
| Electrochemical deburring | Current dissolves the burr locally | None mechanical, no heat | Cross holes, internal intersections, burr-sensitive parts |
| Abrasive flow | Abrasive paste flows through passages | Low | Internal passages and ports |
| Thermal energy deburring | Short gas burst burns the burr | High heat | Not recommended for stabilized Invar |
Typical qualitative comparison. Ask the shop what it actually runs.
Thermal deburring heats the whole part in a gas explosion and would undo stabilization, so it is not suited to precision Invar. Electrochemical methods leave no mechanical stress but need a fixture per part, so they pay off on repeat orders or critical features such as cross-drilled holes.
Why cold work matters
Invar work hardens at its surface. A hand file, an aggressive wire brush or a tumbling bowl all push material around slightly. The effect is shallow, often a few tens of micrometers, but it is stress locked into the surface. On a rigid part it does no harm. On a thin wall, a flat plate or a part with a critical flatness, it can bend the section after the part is released or after a thermal cycle. The mechanism is described in why Invar work hardens and thin sections follow the rules in Invar thin-wall machining.
The practical rule is to remove most burr material before the last stress relief and keep the last deburr light.
Where deburring sits in the sequence
A sensible order for a precision Invar part:
- Rough machine, leaving stock
- Rough deburr, so burrs do not interfere with fixturing and inspection
- Stress relieve after roughing
- Finish machine with the edge break cut in the program
- Light final deburr by hand or non-contact method for remaining burrs
- Stabilize
- Final clean and inspect
The final touch-up should be little more than a pass with a fine stone or a brush with very low pressure. If a part needs heavy work after stabilization, the finishing passes need to be changed instead. Rework by hand at that stage can undo the stability the earlier steps built.
Hypothetical worked example
A buyer orders 50 Invar manifold blocks with 12 cross holes each. The holes intersect inside the block and leave internal burrs that cannot be reached by hand. The numbers below are hypothetical.
- Hand deburring of internal intersections with a flexible tool takes about 40 s per hole, so about 8 min per block, or 6.7 h for the lot.
- Electrochemical deburring needs a fixture and a setup, then runs the whole block in about 3 min.
- Electrochemical wins on time and avoids the cold work from poking tools inside the passages.
- For a lot of 5 blocks the fixture cost is not recovered, so hand work wins.
The break-even depends on lot size and the burr consequence. If a loose burr inside a fluid or vacuum passage would cause failure, electrochemical or abrasive flow is worth it even on a small lot.
Deburring by feature
Different features need different handling, and a good process plan names them one by one.
Outside edges of plates and blocks. The easiest case. Cut a chamfer in the finishing program, then break any remaining edge with a fine abrasive stone or a soft brush. Light pressure and a single direction are enough.
Holes and threads. Drilled holes leave a burr at the exit side and often a rolled edge at the entry. Threads leave a burr at the start and the end. Invar threads are soft and tear easily, so a countersink or chamfer tool is better than a file. Tapped holes in Invar are best finished with a chamfer cut before tapping, so that no hand tool enters the thread. Invar drilling and tapping describes the cutting side.
Cross holes and internal intersections. Burrs inside cannot be seen and cannot be reached. They are best prevented by drilling the smaller hole first from the outside in, or by choosing a design where cross holes meet at a clean angle. When they remain, electrochemical or abrasive flow methods are the usual choices, with an endoscope inspection after.
Thin edges and lips. A thin lip bends under a file. Support it with a backing block, use a very soft brush and take light passes. If the lip is critical, ask whether it can be left with a small specified burr height instead of a zero-burr callout, which costs far less.
Sheet and foil parts. Burrs on laser or waterjet cut sheet are small but sharp. A tumbling step with soft media often suits flat sheet parts, but only if the part is thick enough to resist bending. Thin Invar foil is better left to the cutting process, such as photochemical etching, which gives burr-free edges. That comparison is explored in Invar sheet laser, waterjet and forming.
Cleanliness after deburring
Deburring creates loose metal, abrasive and media residue. These must be removed before inspection and shipment.
- Ultrasonic cleaning in a suitable solvent or aqueous cleaner removes fine particles
- Compressed filtered air blows debris from blind holes and slots
- A final rinse and dry avoids water marks
- For vacuum or space hardware, a cleanroom bake and bagging follow, as in Invar space hardware outgassing and cleanliness
Abrasive media such as silicon carbide or alumina can embed in soft Invar surfaces. Ask the shop what media it uses and whether tumbled parts are checked for embedded particles, especially on sealing or optical faces. Where particle control matters, a non-abrasive method such as electrochemical deburring or a chamfer cut in the program is safer.
Inspecting burr-free edges
Burrs are checked at low magnification, often 10 times, under good light. For critical edges the shop may pull a fingernail or a thin plastic swab along the edge to catch loose material, or use a clean wipe to see if fibers snag. In vacuum or cleanroom work the part is then cleaned and checked for particles. If the drawing says “burr free”, the acceptance test should be named, because otherwise it is a matter of opinion. See Invar passivation for cleaning steps that follow.
Deburring and plating or coating
If a part will be plated, passivated or coated, deburring comes first and the finish follows, because any later edge work removes coating. Plating also builds up at sharp edges and thins in recesses, so an edge break that is too small can leave a sharp, thickly plated ridge that flakes. A radius or chamfer in the range of 0.1 to 0.3 mm gives plating a smoother edge to follow. For parts that will be passivated or cleaned in acid, burrs left in place trap liquid in crevices and cause staining later. These interactions are one reason to tell the shop about the finishing steps at the quote stage.
What to put on the drawing and in the RFQ
- Edge break size and notation for general edges, for example 0.1 to 0.3 mm
- Marked sharp edges, with a burr-free requirement and the inspection method
- Internal intersections that need special deburring, and the method preferred
- Whether the part is stabilized after deburring
- Any method that is not allowed, such as thermal deburring or tumbling
Send the drawing through the RFQ form with the edge callouts marked, and we match you with shops that handle Invar edges and burrs on thin and complex parts. For handbook values see the Invar reference data and the Invar 36 machining page. For the heat treatment cycle that follows rough deburring see Invar stress relief in machining.
Frequently asked questions
Why does Invar form such large burrs?
Invar 36 is a soft, ductile alloy with a low thermal conductivity. At the end of a cut the material bends and tears instead of shearing cleanly, which leaves a long, curled burr attached to the edge. Sharp tools, light finishing passes and a planned exit direction reduce burr size, but they rarely remove the need for a deburring step.
Can deburring change the dimensions of an Invar part?
On a thick part, normally not by an amount that matters. On a thin or slender part, heavy hand work, aggressive brushing or tumbling can bend the section or leave a cold worked layer that releases later. The safest practice is to deburr before the last stress relief and keep any final touch-up very light.
What edge break size should I specify for Invar?
Typical edge breaks run from 0.1 to 0.3 mm for general machined parts. Write the size as a range on the drawing, using the ISO 13715 notation or a plain note such as 'break all edges 0.1 to 0.3 mm'. If a sharp edge is required for a function, say so explicitly and mark the edge.
Reviewed against
- ISO 13715, Technical drawings, Edges of undefined shape, Vocabulary and indications on drawings
- Wikipedia, Deburring
Values in this guide are typical handbook figures for planning. The mill certificate for your heat lot and the shop's quote for your geometry govern.
Need a quote for this part?
Send the drawing. We match you with up to 3 shops that machine Invar and reply within 24 business hours.
Get matched with an Invar shop